Showing posts with label Recipes. Show all posts

Thursday, July 5, 2012

Home-made Muesli Bars


Muesli bars are a healthy food, right? I suppose some are, if you buy the organic, reduced sugar, reduced fat ones. But have a look on the back of the pack. See those weird sounding chemical names? Or the names that come with numbers (like emulsifier 471)? Of course common sense would tell you that in order for a product to stay fresh for months and months on a supermarket shelf, food additives like preservatives will have to be added.

Which makes them not so healthy.

It's convenient buying muesli bars from the shops. I get it. I really do. I've done it myself. But once you've made your own muesli bars, chances are you won't buy them from the supermarket anymore. Besides it being cheap as chips to make your own, you can also vary the ingredients.

This recipe is really versatile. I've made it a few times, and each time the muesli bars are different. Play around with the ingredients. I don't have wheatgerm at home, so I increased the rolled oats quantity to 1.5 cups. I don't like too many sesame seeds, so I reduced the amount and topped it up with something else. Besides the sultanas, I've also tried other dried fruit like cranberries, apricots, apples, dates. All very yummy. Next time I will add flaxseed too. Or maybe chocolate chips if I was making them as a treat.

You could also add nuts, but I left them out because Miss Pantry's preschool has a nut-free policy.

One thing to remember though, you have to include the brown sugar and honey, to make the caramel that binds the ingredients together. Otherwise you'll end up with yummy muesli, instead of muesli bars, as I found out one time when I omitted most of the sugar.

After cutting into bars, I wrap each one in baking paper so they don't all stick together. And it's easy to grab-and-go. I cut each bar small, about half the size of the average muesli bar. I found this easier for Miss Pantry to handle, and it also reduces food wastage.

Recipe adapted from Taste.com.au
Prep and cooking time: Less than 30 minutes (longer if your 3.5 year old preschooler is helping!)
Makes 16 bars.

Ingredients:
  • 1 cup rolled oats
  • 1 cup desiccated coconut
  • 1/2 cup wheatgerm
  • 1/2 cup sesame seeds (I reduced to 1/8 cup)
  • 1/2 cup sunflower kernels
  • 1/2 cup pumpkin seeds (pepitas)
  • 1 cup sultanas
  • 125g butter (I reduced to 100g)
  • 1/2 cup honey
  • 1/3 cup brown sugar (reduced to 1/4 cup, which is just enough to help the muesli stick)

Method:
  1. Grease and line a baking pan with baking paper. Cook oats, coconut, wheatgerm, sesame seeds, sunflower kernels and pumpkin seeds over medium heat, stirring, for 8 to 10 minutes or until golden. Transfer to a bowl. Set aside to cool. Stir in sultanas.
  2. Cook butter, honey and sugar in a small saucepan over medium heat, stirring, for 3 to 4 minutes or until sugar dissolves. Bring to the boil. Reduce heat to low. Simmer, without stirring, for 7 minutes or until mixture forms a soft ball when a little is dropped into ice-cold water. Add to dry ingredients. Stir until combined.
  3. Spoon mixture into pan. Use a large metal spoon to press down firmly (I use a sheet of baking paper and press down with my hand to compact the muesli). Allow to cool. Cut into squares. Store in a foil-lined airtight container for up to 7 days.

Happy cooking!

Wednesday, December 21, 2011

Christmas Shortbread Stars

Can you see the corner of the cardboard I used as a reflector? It didn't help much though. It was such an overcast day, I couldn't get rid of the shadows, so these photos are quite dark.

My kitchen is a flurry of action this week. I am busy baking cookies for the tradespeople who come to do work on our house. It would probably be easier to buy ready made cookies, but where's the spirit of Christmas giving in that??

Besides, how could I deny Miss Pantry the chance to "help" Mummy in the kitchen? She loves to pour ingredients into the mixing bowl and mix it all up with the whisk. It's a bit messy, but there's no time like the present to start including her in the kitchen. Being able to cook is an important life skill (in my opinion), and one that I want my children to have.


I've posted a shortbread recipe previously. This recipe is similar, except there's no egg. But I'll be honest, the dough is fiddly. At first I thought I'd never get the crumbly pieces to come together. But persistence, or rather sheer pig-headedness in my case does pay off. Just keep kneading, and the warmth of your hands help it stick.

Fiddly dough aside, these are the best homemade shortbread I have ever tasted. It is buttery as expected, but the crumbs are extremely fine, and the texture so light and delicate, it is almost powdery. Even Mr Pantry declared that "these are much better than the other shortbread and so easy to eat".


Eat them as they are, dust some icing sugar over the top, sandwich with jam, dip in chocolate, sprinkles, nuts, or whatever else floats your boat, but make sure you make them today!

And be warned. These are so yummy, it is hard to stop at one!

Recipe from Western Star.

Happy baking and Merry Christmas!


Wednesday, December 14, 2011

Teeth-Sticking-Plate-a-Licking Chocolate Caramel Slice

Such beautiful layers, don't you think? Who says brown coloured food is ugly?


Ah, dear readers. The things I do for you. In order to make my chocolate slice look presentable for photos, I trimmed off all the crusty edges. So that you can see the beautiful jaw sticking layers inside. And of course, one must not waste food, so I had to eat those off cuts. But I did it with you in mind. Really.

 Even the off cuts are beautiful.

This slice is sweeeeeet. Perfect for sharing with people you love durng Christmas. So make it! Believe me, everyone will love you that little bit more after tasting it.


As Miss Pantry would say, "All gone"!

Recipe from Donna Hay Modern Classics Book 2 and here.

Happy baking!


Friday, December 9, 2011

Smoked Ham and Cheddar Quiche

Miss Pantry's childcare was having their annual Christmas party for the children, and I volunteered to bring a quiche.


My lovely quiche, in all its goldeny glory.

The most time consuming part was making the pastry, my obsessive compulsiveness did not do well here. Trying to get the pastry the same thickness throughout and making sure I got a nice fluted edge was time consuming, not to mention complete insanity because I was just going to pour the filling over the top anyway!


Look! I spy a fluted edge!

Next time I might just buy some ready rolled shortcrust pastry to save time and spare my poor brain cells from self-combustion.


Parsley from my garden.

But don't let me put you off making the pastry for this scrumptious open-faced pie. Normally, I find kneading and rolling pastry quite therapeutic, but because I was making this for other people, I wanted to make a good impression (pun intended). The rest of the quiche was so easily assembled, a monkey could do it. Or your typical OCD Asian housewife like myself.


Recipe from Donna Hay Modern Classics Book 1.

Basic shortcrust pastry ingredients:
  • 2 cups flour
  • 145g butter
  • 2-3 tablespoons iced water

Method:
  1. Put flour and butter in food processor and whiz until mixture looks like fine breadcrumbs.
  2. While motor is running, add enough iced water to form a smooth dough.
  3. Knead lightly and wrap in plastic wrap. Refrigerate for 30 minutes. When ready to use, roll on floured surface to 3 mm thick and line your quiche dish/tart dish. 


Quiche ingredients:
  • 350g shortcrust pastry, above
  • filling ingredients from here
Method:
  1. Preheat oven 180 degrees C. Roll pastry as above.
  2. Blind bake pastry shell (baking paper over shell, add weights, bake 10 minutes, then remove weights and bake another 5 minutes) and set aside to cool.
  3. Reduce oven to 160 degrees C.
  4. Sprinkle pastry shell with ham, cheese and parsley. Whisk together eggs, cream, mustard, salt and pepper.
  5. Pour over filling and bake 40 minutes or until set.

Happy cooking!

Thursday, November 3, 2011

Fettucini with Lemon, Garlic and Thyme Mushrooms


This has got to be the easiest pasta dish I have ever prepared. Usually my pasta dishes are chock-a-block full of ingredients. Mince, prawns, chorizo, onions, vegetables etc etc (not usually all these at once). And lots and lots of sauce.

It was nice not having to do too much prep work beforehand. In any case, I did have a hungry toddler shouting "Dinnertime Mummy!" at me whilst I was cooking. So dinner had to be on the table pronto.


This dish uses the juice and zest of one lemon. I like my pasta savoury, and I wasn't sure how the lemon would complement it. So instead of the juice of an entire lemon, I used half.


Verdict?

Wowsers! This dish knocked my socks off! Its simplicity really shone through. Compared to the tomato based sauce laden pasta I normally prepare, this was light and refreshing. There were only a handful of ingredients, but they complemented each other so well. The lemony taste was mellow, perhaps next time I will juice the whole lemon for comparison.

I might also add that I didn't have any fresh herbs on hand, so I substituted with dried ones. And I didn't have the linguine that the recipe called for, so I used fettucini instead. And I didn't have the chestnut mushrooms, so I used button mushrooms. So you see, it's really a very versatile and forgiving dish. I reckon you could use penne or macaroni and it would still be good.

This dish will have to be on my menu rotation. Or at the very least, be added to my list of dishes I fall back on when I'm cooking for myself.


Recipe from Nigella Express
Ingredients:
  • 225g chestnut mushrooms
  • 80ml extra virgin olive oil
  • 15ml tablespoon Maldon salt or 1.5 teaspoon table salt
  • 1 small clove of garlic, crushed
  • zest and juice of 1 lemon
  • 4 sprigs fresh thyme, leaves stripped
  • 500g linguine (or pasta of your choice)
  • fresh parsley, chopped
  • grated Parmesan
  • freshly ground pepper

Method:
  1. Slice mushrooms and toss into a large bowl with the oil, salt, garlic, lemon juice, zest and thyme leaves.
  2. Cook pasta, drain it, then add it to the mushroom mixture.
  3. Toss everything well, then add parsley, Parmesan and pepper to taste.
  4. Serves 4-6.

Happy cooking!

Monday, October 31, 2011

Shortbread


These are my Mum's favourite biscuits. Crumbly, buttery shortbread.

However, would it surprise you if I said that Mum doesn't like butter? Nope, can't stand the taste, the smell, the texture. But give her a plate of these? And she just about inhales them.
I could never figure out why, because these biscuits are baked with almost the entire stick of butter (220g)!


These biscuits are fabulous with a cup of coffee. The rice flour gives it a nice crumbly interior, while the exterior holds its shape rather well. They are good travellers too. I would know, because these biscuits survived a plane trip in my suitcase. Yes, my suitcase, stored in ziploc bags no less. And they arrived at their destination looking just as unblemished as they were when I packed them.


Make these today, won't you?


Recipe from Donna Hay's Modern Classics Book 2
Ingredients:
  • 220g chilled butter, chopped
  • 2/3 cup caster sugar
  • 2 cups plain flour
  • 1/2 cup rice flour
  • 1 teaspoon vanilla extract
  • 1 egg

Method
  1. Preheat oven to 160ºC. Line trays with non-stick baking paper. Process all ingredients in a food processor until a dough forms.
  2. Place the dough on a lightly floured surface and knead gently.
  3. Roll tablespoons of dough into balls. Place on baking trays and flatten slightly with a fork.
  4. Bake for 22-25 minutes or until just golden brown.

Notes:
I used my KitchenAid mixer for this because my food processor is too small. First I creamed the butter and sugar, then added vanilla and egg, before adding the flours half a cup at a time.
Happy baking!

Thursday, October 27, 2011

White Chocolate Chunk and Cranberry Cookies

Somehow my cookies always end up stacked. It's the easiest composition, since I only take pictures while Miss Pantry is having a nap.


I have a sweet tooth. As if you didn't already know.

Every few days, I get the urge to eat something sweet. Oh who am I kidding? I get the urge for something sweet daily. So I turn to my stash of chocolate when the cravings strike. And before I know it, I'd have eaten half a slab and I'll spend the rest of the day feeling like a fat slob.

Only sometimes will I let the annoying thing called will-power get in the way. I think my butt subconsciously knows that too much chocolate is not good for it.


Well, here you go. Partially unstacked and with a ribbon. Wow.

Times like this, I curse that I am not blessed with super high metabolism or the skinny gene. Or that I don't look like Miranda Kerr - I have a secret crush on her. She's gorgeous and advocates a healthy lifestyle. And she drinks chlorophyll. It's supposed to help with something, cell regeneration or whatnot. I forget. Maybe I should drink chlorophyll, might help with memory.

So anyhow, in an effort to eat less chocolate/packaged cookies/store-bought-highly-processed junk, I figured I'll make my own sweet snacks. If I made them, then I get to eat them without feeling guilty, because I'll know exactly how much sugar or fat has gone into them. Right?

I know what you are thinking right now. You're thinking "this cookie has chocolate and processed sugar in it"! Yes, yes, you are right. And it does make this cookie decadently sweet. But you see, that is the key. Because it is sweet, one (or two) cookies will be enough to satiate my sugar cravings.

Ingenious isn't it?

Recipe adapted from Taste.com.au
Yields 32 cookies

Ingredients:
  • 125g butter, softened
  • ¼ cup caster sugar
  • ¼ cup firmly packed brown sugar
  • 1 egg
  • ⅓ cup rice flour
  • ½ cup almond meal
  • ¾ cup plain flour
  • ½ cup dried cranberries
  • 150g white chocolate, roughly chopped

Method:
  1. Preheat oven to 180ºC (160ºC fan forced).
  2. Beat butter and sugars until light and fluffy. Add egg. Beat until combined.
  3. Stir in flours, almond meal, chocolate and cranberries.
  4. Roll level tablespoons of mixture into balls and place 5 cm apart on trays. Flatten slightly. Bake for 12 to 15 minutes or until light golden. Cool for 5 minutes on trays before transferring to racks.

Happy baking!

Tuesday, October 25, 2011

Amaretti Amore


Gosh, it has been ONE YEAR since my last post. Is anyone still following this blog? I don't blame you if you're not.

To lure you back, here's a sweet incentive. These are extremely easy to eat! Crunchy on the outside, soft and chewy on the inside. With a subtle hit of almondy goodness. Ah, I'm in love.

Recipe from The Australian Women's Weekly cookbooks: Wicked sweet indulgences
Yields 20 biscuits

Ingredients:
  • 1 cup (125g) almond meal
  • 1 cup (220g) caster sugar
  • 2 egg whites
  • ¼ teaspoon almond essence
  • 20 blanched alomonds (20g)

Method:
  1. Line 2 oven trays.
  2. Beat almond meal, sugar, egg whites and essence in a small bowl with electric mixer for 3 minutes; stand 5 minutes.
  3. Spoon mixture into piping bag fitted with a 1cm plain tube. Pipe directly onto prepared tray in a circular motion from centre out, to make biscuits about 4cm in diameter.
  4. Top each biscuit with an almond. Cover trays of unbaked biscuits loosely with foil; stand at room temperature overnight.
  5. Preheat oven to 180ºC. Bake biscuits for 12 minutes or until browned lightly. Stand amaretti for 5 minutes then transfer to wire rack to cool.
Tip: Amaretti can be baked the day they are made, however, they will spread a little more. For best results, stand the unbaked biscuits overnight.

Happy baking!

Friday, October 22, 2010

Anzac Biscuits


This has got to be one of the easiest biscuit recipe ever. It's yummy. It's economical. It stores well. There is no egg, so it's safe to give to people with egg allergy. Did I mention that it's yummy too?

Think how happy your children/partners/friends/family/colleagues/neighbours will be when they taste this biscuit. And the pride and warm-glowy feeling it will give you, knowing that YOU baked it. Out of l.o.v.e for them. You'll feel like the genius-domestic-goddess/god-extraordinaire that you are.

And look, because I love you, I've baked some for you. I've even tied a ribbon too. Aren't I nice?

Happy Friday and have a great weekend.


Recipe from Donna Hay's Modern Classics Book 2:


Ingredients:
  • 1 cup rolled oats
  • 1 cup plain (all purpose) flour
  • ½ cup sugar
  • ¾ cup desiccated coconut
  • 2 tablespoons golden syrup
  • 125g (4 oz) butter
  • ½ teaspoon bicarbonate of soda (baking soda)
  • 1 tablespoon hot water

Method:
  1. Preheat oven to 160ºC. Place oats, flour, sugar and coconut in a bowl.
  2. Place the golden syrup and butter in a saucepan over low heat and allow to melt.
  3. Mix bicarbonate of soda with the water and add to the butter mixture. Pour butter mixture into the dry ingredients and mix well.
  4. Place tablespoonfuls of the mixture on baking trays lined with non-stick baking paper, allowing room for the biscuits to spread, and flatten slightly.
  5. Bake for 10 minutes or until golden. Cool on wire racks.

Notes:  
  • Makes 22. (I usually get 20 or 21 only, each of my biscuits might be a bit bigger)

Wednesday, September 1, 2010

Apple and Sultana Mini Muffins


It's Spring! It's Spring! It's finally here! Yippee! And a beautiful 24 degrees celsius it is too in Sydney.

To celebrate the arrival of Spring, and to celebrate my inner domestic goddess, I've slaved for hours in the kitchen to bake you some Apple and Sultana mini muffins.

Oh alright. I fibbed. You caught me out. The truth is, I had one lonely unloved apple that I wanted to use up, and a surplus of sultanas left over from the sultana and cornflake cookies baked last week.

But the muffins look lovely, don't they?

Recipe adapted from Taste.com.au
Prep time: 10 minutes
Cooking time: 20 minutes

Ingredients:
  • 2 cups (300g) self-raising flour, sifted
  • ⅔ cup (150g) caster sugar
  • 1 cups (250ml) buttermilk
  • 2 eggs, lightly beaten
  • ⅓ cups (80ml) vegetable oil
  • ½ tsp cinnamon
  • 1 finely chopped pink lady apple, skin on
  • ½ cup (85g) sultanas

Method:
  1. Preheat oven to 180°C. Place flour and sugar in a large bowl.
  2. In a separate bowl, whisk together buttermilk, eggs, oil and cinnamon. Stir through apple and sultanas.
  3. Pour wet mixture into dry ingredients and stir until just combined. Spoon mixture into a lightly greased 12-hole, 1/2 cup muffin pan, taking care not to overfill.
  4. Place in oven and bake for 20 minutes or until golden. Serve warm or cold.

Notes:
  • I used a mini muffin pan, halved the recipe and got 12 mini muffins.
  • I used mini cupcake liners, thus avoiding the need to grease the muffin pan. Less washing up!
  • I sprinkled rolled oats over the top of muffin mixture prior to baking for some crunch and bite.

Happy baking!

Thursday, August 26, 2010

Sultana and Cornflake Cookies


Are you one of those people who has bits of unfinished cereal lurking in your pantry? A handful of cornflakes, a handful of museli, bit of rolled oats here, bit of Weetbix there?

If you are nodding your head (or am I the only one?), then this recipe is for you!

Next time you decide to bake cookies, don't fall back on the predictable chocolate chip cookie (nothing against CCCs, I love them). Try this one instead. It has fruit (sultanas), and vegetables (corn-flakes)! It's healthy! Ok, stretching it a little. Much like the waistband of my tracksuit.

But enough about my weight issues.

Bake this. Today.


Recipe from Taste.com.au

Ingredients:
  • 125g butter, chopped, at room temperature
  • ⅔ cup caster sugar
  • 1 tsp vanilla extract
  • 1¼ cups self-raising flour, sifted
  • 1 tbs milk
  • 1½ cups cornflakes
  • ½ cup sultanas


Method:

  1. Preheat oven to 180°C. Line two large flat baking trays with non-stick paper.
  2. Using electric mixer, cream the butter, sugar and vanilla essence in a mixing bowl until creamy. Add the flour and mix on low speed until just combined. Add milk and mix until dough comes together. Using a wooden spoon, stir in cornflakes and sultanas, and mix until well combined.
  3. Using 1 tbsp of mixture, roll into balls. Place onto baking trays allowing room for spreading. Flatten slightly with a spatula. Bake for 12-14 minutes, swapping trays after 8 minutes or until light golden. Stand for 5 minutes on tray before transferring to a wire rack to cool.


Notes:
  • Don't overbake, cookies harden on cooling.
  • Mixture was quite crumbly, adding a little more milk might help.

Happy baking!


Friday, August 20, 2010

Apple Crumble Apologies


I was a witch of a wife to Mr Pantry last week. The poor man, I'd bet he was thinking he'd gotten a very raw deal indeed. He was great though, and tried his best to cheer me up, but eventually decided that the best and probably safest thing to do was to leave me alone to fume, while he pretended to be a churchmouse (Geddit? He was quiet).

So, to say Sorry, I made him a dessert. If only he has a sweet tooth for chocolate, I could just share my chocolate stash, that would be so convenient. But this isn't about me. I'm trying to do a bit of grovelling, show that I am sorry, and I resolve to be less of a witch... next time. This can be done in under an hour, not bad for grovelling.

Recipe from adapted from Donna Hay Modern Classics Book 2 and Quinn's Baking Diary:
Prep time 20 minutes
Cooking time 20 minutes

Ingredients:
  • 2 apples (I used Pink Lady apples), peeled, cored and chopped
  • ½ tbsp caster sugar
  • 1 tbsp sultanas
  • pinch of cinnamon
  • 2 tbsp plain flour
  • 20g butter (I used 25g)
  • 1½ tbsp dark brown sugar
  • 2 tbsp rolled oats
  • 2 tbsp crumbled walnuts (I used almonds)
  • 1 tsp lemon juice

Method:

  1. Preheat oven to 180°C. Place the apples, caster sugar, sultanas, cinnamon and lemon juice in a bowl and stir to combine.

  2. Transfer apple mixture into 2 small oven-proof serving bowls or ramekins.

  3. To make the topping, place flour, butter, dark brown sugar, rolled oats and crumbled walnuts in a bowl and mix well to combine. Scatter topping over the apples, covering the apples completely.

  4. Bake for 15- 20mins or until the toppings are golden brown and crisp and the apple is soft.

  5. Serve warm, with thick (double) cream or ice-cream.
Notes:
  • Serves 2.
  • This is a very forgiving dessert, so feel free to play around with the ingredients. Plain flour can be substituted with self-raising flour or wholemeal flour. I used Pink Lady apples, but usually Granny Smiths (green apples) are used instead. I don't have them in the house because I find them a bit tart for eating. Don't like apples? Use pears, berries, cherries, peaches, plums... the possibilities are endless. No nuts in the house? Use almond meal, or omit nuts. You can even substitute with muesli if you want to.
  • Lemon juice can be omitted. Or use 1 tsp lemon rind if you like.

Have a sweet day (hopefully not filled with witchy witches!)

Wednesday, August 11, 2010

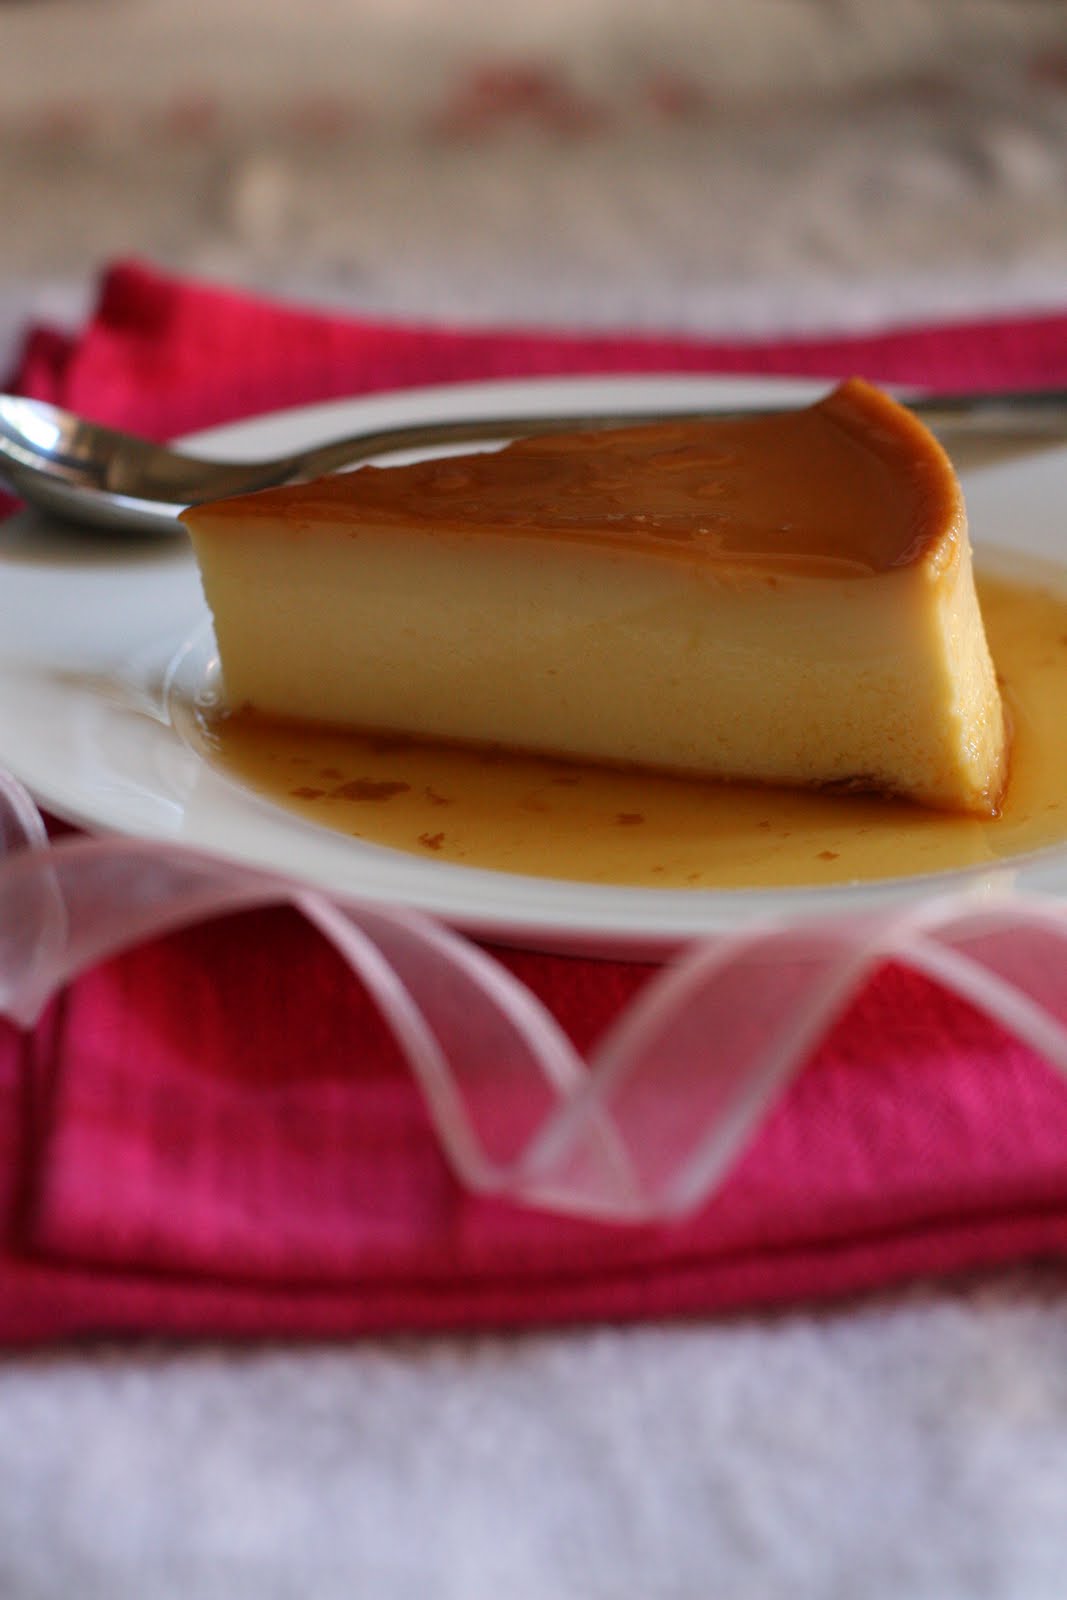
Crème caramel


Cream
Get on top
Cream
You will cop
Cream
Don't you stop
Cream
Sh-boogie bop

This song from Prince pops into my head everytime I use cream in desserts. You're rolling your eyes at me. Lame, I know. OK, moving on.

I'd always thought it was fiddly to make crème caramel, but it was so easy! It is now one of the desserts I never order in restaurants anymore, since I can make it myself.

When baking or making desserts, go FULL FAT all the way. The taste is superior when you use full fat products, and because of the higher fat content, they keep better too.

However, in the interest of my waistline (I gotta stop pigging out on the cookies I bake!), I've used light milk instead. Gasp! Forgive me, my Sweet Tooth Fairy, but Mr Pantry does not think the muumuu is sexy. I'm afraid he might divorce me if the only thing I can fit into is a muumuu. Haha. And perhaps also put a paperbag over my head when we go out.

Anyhoo, this crème caramel is so luscious, so smooth, almost melting in your mouth - it blew my tastebuds out of this galaxy. Like they say in Hollywood, I die!


Recipe from The Australian Women's Weekly cookbook: Cooking Class Basic
Prep time 20 minutes
Cooking time 50 minutes

Ingredients:
  • ¾ cup (165g) caster sugar
  • ¾ cup (180ml) water
  • 6 eggs (60g each egg, but I used 70g ones)
  • 2 tsp vanilla essence (I used extract)
  • ⅓ cup (75g) caster sugar, extra
  • 1¾ cups (430ml) milk (I used light milk)
  • 300ml thickened cream (err... I used full fat)

Method:
  1. Combine sugar and water in medium saucepan over medium heat; stirring constantly without boiling until sugar dissolves. Use pastry brush dipped in water to brush any sugar crystals down from the side of the pan before mixture boils.
  2. Bring sugar mixture to a boil; boil rapidly, uncovered, without stirring, about 5 minutes or until sugar mixture turns a light golden brown.
  3. Pour caramel into a deep 20cm round cake tin, hold tin using cloth. Quickly tilt tin to coat base evenly with caramel. Caramel will set at this stage.
  4. Lightly whisk eggs, extract and extra sugar in medium bowl. Don't overwhisk. Combine milk and cream in medium saucepan, bring to a boil. Reduce heat, allow bubbles to subside from side of pan. Gradually whisk milk mixture into egg mixture; strain into cake pan over caramel.
  5. Pre-heat oven to 160 degree celsius. Place cake tin in baking dish with enough boiling water to come halfway up side of the tin. Bake about 40 minutes or until custard is just set; it will set further on cooling. Remove cake tin from water, cool to room temperature, then cover and refrigerate overnight.
  6. Run a knife carefully around the edge of the custard. Place a dish deep enough to catch the caramel over the cake tin, invert the tin, and serve!
Notes:
  • Serves 8.
  • Recipe must be made a day ahead, to allow the caramel to liquify. It will keep for up to 4 days, refrigerated and covered.
  • Instead of a cake tin, you can use individual ramekins.

Have a sweet day everyone.

Thursday, May 20, 2010

Sweetened Condensed Milk Coffee Pound Cake

Coffee and condensed milk. How can this combination ever lose?

I love condensed milk. When I was little, I used to eat it straight out of the can, or mixed with Nestum malt flakes (if you grew up in Southeast Asia, you'll know what I'm talking about) and Milo. It's one big sugar hit.


Gah, I really must iron the tablecloth, the SLR shows up every single crease!


Recipe adapted from Table for 2 or more:

Ingredients:
120gm good quality butter

45gm sugar

1/4 tsp salt

1/2 cup condensed milk

1 tsp vanilla extract*

120gm all-purpose flour*

3/4 tsp baking powder

2 large eggs


Method:
1. Sift flour and baking powder together. Set aside.

2. Cream butter and sugar till light and fluffy, about 2 mins

3. Add in salt and vanilla and cream well.

4. Pour in condensed milk and cream till well combined.

5. Using the mixer on low speed, add in flour in 3 additions. Mix till batter is smooth.

6. Add in eggs one at a time. Make sure it's well mixed and smooth.

7. Bake at 170 degrees for 40 minutes.*


To make it coffee flavoured, dissolve 1 tbsp instant coffee with 1 tbsp hot water, and mix it in the batter after step 6.

* Original recipe called for vanilla paste and cake flour, which I don't have in my pantry. Must remedy! Baking time in the original recipe was 175 degrees C for 1 hour.


This cake is lovely with a cup of tea. It's fine crumbed, not too sweet and not at all heavy like mud cake. There's just a hint of coffee in the cake, so it shouldn't overpower non-coffee drinkers. I suppose you could jazz it up with a glaze of some sort if you wish, but I like it just as it is.
 
Yummy. Happy baking.

~ Keep calm and have a cupcake ~